Visual Signals 3D
An asset by Hectarea
Install Asset
Install via Godot
To maintain one source of truth, Godot Asset Library is just a mirror of the old asset library so you can download directly on Godot via the integrated asset library browser


Quick Information

Visual Signals 3D
This plugin lets you create signals with a visual representation. These connections are drawn as well. And, lastly, connecting signals is done via inspector.
Supported Engine Version
4.1
Version String
1.0.0
License Version
Unlicense
Support Level
community
Modified Date
2 years ago
Git URL
Issue URL
Visual Signals 3D
This is a plugin to create visual signals.

Introduction
Godot has signals that implements the very known Observer pattern. A signal can be emitted and the observers can react in consecuence.
This plugin adds an extra layer to visualize these signals.
Visual Signals 3D follows an ECS approach (Entity Component System). Each visual signal will be a node. This node must be seen as a component of the current scene. Thus, the current scene will be an object containing one or more components. Then, you can connect the different objects placed in a greater scene.
Visual signals
When talking about signals, there are two sides: The emitter and the receiver. To connect two objects, one object must have an emitter, and the other one a receiver. These emitters and receivers are just nodes. For example, you might have an object with a Signal3DEmitter node, and another with a Signal3DReceiver node. The minimum you must know about these nodes is that emitters have a method named emit (same as normal signals), and receivers have a normal signal called receive_signal. The object with the emitter can emit a signal whenever it wants just by calling the emitter's method emit. On the other side, the object with the receiver can receive that signal just by connecting with the receiver's signal receive_signal.
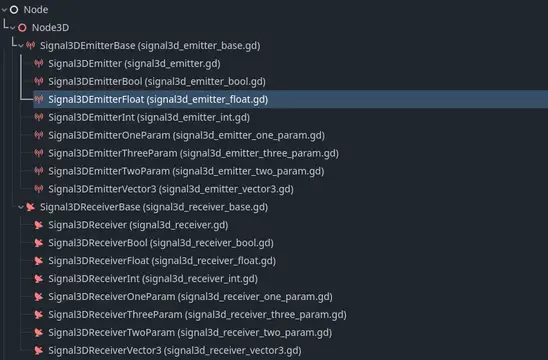
A signal has a signature. It can receive a specific number of arguments. That's why we can have several types of emitters and receivers. Here is a list with all the signals that come with this plugin:

The name of the signal reveals how its signature is. If it has the suffix <number>Param, then the signal has the number of params it sais. For example, Signal3DEmitterTwoParam has 2 parameters. These parameters can be of any type. However, we have signals like Signal3DEmitterBool that has only one parameter of type bool.
As you may already thinking, emitters and receivers can only be connected if they are of the same type. For example, Signal3DEmitterFloat only can be connected with Signal3DReceiverFloat.
Creating visual signals
To show how to create visual signals we are going to follow the next example: We want an object that emits a signal every second with a number increasing at each tick; also, we want an object that will print every number it receives from a signal.
These objects are in this repository inside the example folder.
Creating a signal emitter
First, let's create a new scene called Clock. It has a sprite and a timer. Nothing new for now.

Now, I'm adding a new Signal3DEmitterInt.

I'm calling it OnTick.

Now, we want a script on the root node to manage the timer and, later on, the signal emitter.

Let's connect the timer's signal.

The method we will implement should call the emitter's emit method.

Finally we can adjust the position of our emitter.

Creating a signal receiver
The nest step is creating an object with a receiver. Let's create a new scene called Printer. It also has a sprite.

Add a Signal3DReceiverInt.

I'm calling it Print.

We want a script to handle the receiving of signals.

Remember that receivers have a normal signal to let us know when a signal is received. Let's connect it.

The method to implement just prints the received integer.

Finally, adjust the receiver position.

Connecting the signals
With Visual Signals 3D, the receivers are the nodes that are connected to emitters and not viceversa. To illustrate this, let's create a new scene called example. I've added some light and a sky, but feel free to leave it blank.

Let's instantiate a Clock and a Printer. You will notice that a new node called SignalManager has been created. This node is necessary to handle the connections between emitters and receivers. Also, it is the responsible to draw that connections.

When selecting an object that contains one or more receivers, it will have extra properties at top of the inspector. A new property is created for each receiver the object contains.

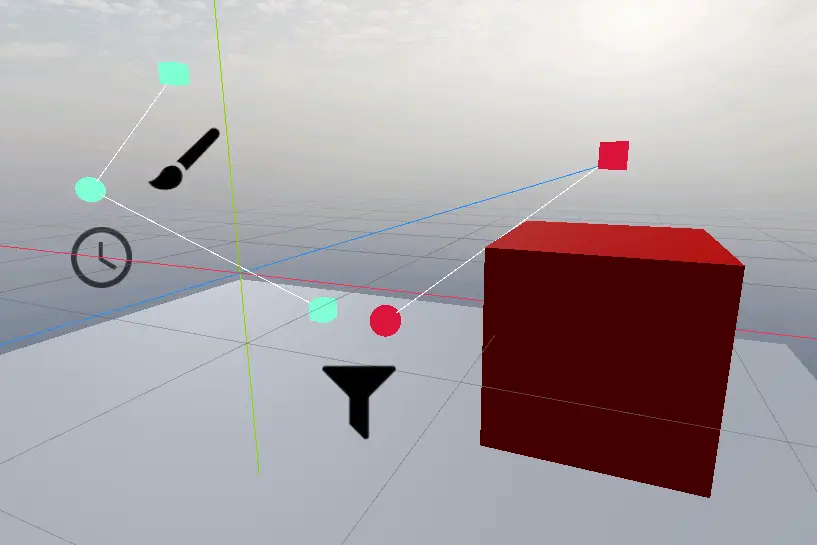
Clicking on the dropdown will show all the emitters that can be connected to that receiver. Also, a visual line will be drawn to tell us what emitter we are going to connect to.

Once you select an emitter the connection will be drawn as a white line.

And that's all! We can run the scene and see the Printer printing the numbers generated by the Clock.

This plugin lets you create signals with a visual representation. These connections are drawn as well. And, lastly, connecting signals is done via inspector.
Reviews
Quick Information
Visual Signals 3D
This plugin lets you create signals with a visual representation. These connections are drawn as well. And, lastly, connecting signals is done via inspector.
Supported Engine Version
4.1
Version String
1.0.0
License Version
Unlicense
Support Level
community
Modified Date
2 years ago
Git URL
Issue URL