Subtitle Support Sample Project
An asset by fede0d
Install Asset
Install via Godot
To maintain one source of truth, Godot Asset Library is just a mirror of the old asset library so you can download directly on Godot via the integrated asset library browser
Quick Information

Subtitle Support Sample Project
This plugin was created to help you work with subtitles inside Godot. It allowes you to import an srt format subtitle file into any scene.It works by converting the SRT file into a Godot Animation Resource. This way you can use any AnimationPlayer and RichLabelText node to play the subtitle.The reason behind using an Animation Resouce is to take advantage of the power of animations in Godot. Once the animation is created, all the information is compressed and managed by the engine just like any other resource.
Supported Engine Version
3.4
Version String
0.1
License Version
MIT
Support Level
community
Modified Date
3 years ago
Git URL
Issue URL
Godot Subtitles Plugin
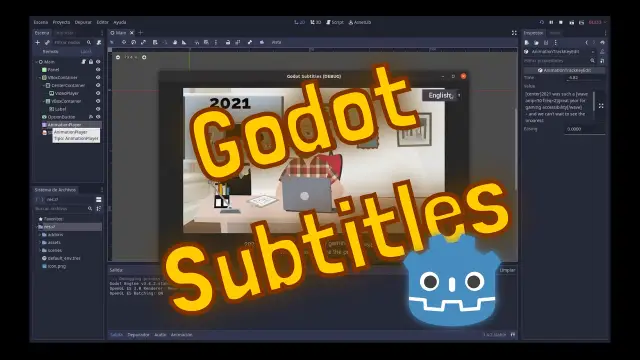
This is a sample project that shows how to use both "SRTImporter" and "LiveCaption" nodes for Godot 3.
The project includes:
- A sample scene including an ogv format video and srt subtitles both on spanish and english, imported into the scene using the SRTImporter node.
- A playground scene where you can play with the LiveCaption node.
How to install the plugin?
Just import the "godot_subtitles" addon folder inside your project and enable the plugin inside the project manager. After doing this you will find the new nodes available for you.
1. SRTImporter node

This node was created to help you work with subtitles inside Godot. It allowes you to import an srt format subtitle file into any scene.
It works by converting the SRT file into a Godot Animation Resource. This way you can use any AnimationPlayer and RichLabelText node to show the subtitles.
The reason behind using an Animation Resouce is to take advantage of the power of animations in Godot. Once the animation is created, all the information is compressed and managed by the engine just like any other resource.
How to use the SRTImporter node?
Once you import the addon, you will find available the new "SRTImporter" node.
This node will import the srt and save it into an Animation, displaying the captions on any RichLabelText node that you have on your scene. You will have to setup some node properties first:

SRT file: select any .srt file that you want to importLabel node: the path to the RichTextLabel node where you want to show the subtitlesAnimationPlayer node: the path to the AnimationPlayer node where you want to create the new animationAnimation name: the name of the new animation. If an animation with the same name exists within the animation player, it will overwrittenAnimation step: this is the step used for the new animation, you will probably want to keep this on 0.001Alignment: forces an alignment on every line of the subtitle. Options are center, left, right and fill.Import animation: used to import the srt file into the animation player
Once you finished the setup of the SRTImported node you can click the "Import Animation" checkbox to import the srt file.
If you go to the animation player you will now see a new animation, where the tracks are animating the bbcode_text property of the richTextLabel node.

2. LiveCaption node
The LiveCaption node is ment to be used as a way to easily show subtitles and all kind of captions into the screen. With this node you can:
- show dialog using proper dialog text format (i.e
[Harry] ¡Hello!) - configure dialog color by character
- apply a "mood" to the dialog: using several text formats and effects
- show descriptive caption: used to caption sources of sounds other than dialogs. (i.e
[Door closing sound])
How to use the LiveCaption node?
Just add a LiveCaption node into any scene. You can reference this node from any script to access and use any of the LiveCaption methods (caption(), dialog(), descriptive()).
You can create a subtitle easily by calling:
live_caption.caption("Hello, world!").

Or create a character and show dialog by calling:
live_caption.set_character_color("Alyx Vance", Color.cornflower)
live_caption.dialog("Alyx Vance", "Dr. Freeman, I pressume?")

Apply several moods:
live_caption.dialog("G-Man", "Time to choose...", LiveCaption.CAPTION_MOOD.SHAKE)

LiveCaption properties

duration: floatthe default duration for all captionsinter_duration: floatthe duration of the pause between captionsalignment: [center, left, right, fill]default alignment of the caption on screendefault_color: Colorthe default color for all captionsshake_rate: intthe value of the rate attribute for the shake effectshake_level: intthe value of level attribute for the shake effect
LiveCaption methods
* caption(text: String, force_clear: bool = false, timeout: float = duration)
Displays the the "text" content on screen. Use "force_clear" to clear any content on the screen before showing this caption. Use "timeout" to setup a custom duration for this caption
* dialog(character: String, text: String, mood: int = CAPTION_MOOD.DEFAULT, force_clear: bool = false, timeout: float = duration)
Displays the "text" content on the screen, using a character dialog format. Character name will be shown using bracket symbols, and the text can be tinted with a custom color. Additionally a "mood" can be applied to the dialog, displaying an custom format/effect on the text shown. See available moods on the CAPTION_MOOD enum.
* descriptive(text: String, force_clear: bool = false, timeout: float = duration)
Displays the "text" content on the screen, using a descriptive caption format. Use descriptive captions for other kind of sounds that are not dialog, for example: scene descriptions, explosions, gun fires, etc.
* set_character_color(character: String, color: Color)
Sets a custom color on any character. This color is used to tint the character dialog on screen.
* CAPTION_MOOD: enum
DEFAULTdefault caption formatUPPERCASEapplies uppercase to the captionQUOTEwraps the caption on double quotes and italicITALICshows the caption on italicBOLDshows the caption on boldSHAKEapplies a shake effect on the caption
BBCode
This plugin works only with a RichTextLabel node, because it takes advantage of the bb code format available on this node to show formatted text.
Default srt formatting tags will be converted into BB code:
- </b> will be converted to [b] (bold text)
- </i> will be converted to [i] (italic text)
- </u> will be converted to [u] (underlined text)
- <font color="#FF0000">...</font> will be converted to [color=#FF0000]...[/color]
You can also use any SRT editor and bbcode text on the LiveCaption node to work with your custom BB Code tags, it will be converted correctly by the plugin. For example you can use the custom bb code tags from Godot:
- [wave][/wave]
- [rainbow][/rainbow]
- [url]
- any other official bb code tags
Contact me
My name is Federico Pacheco and you can reach me if at github.com/fede0d you have any questions or ideas about the plugin.
This plugin was created to help you work with subtitles inside Godot. It allowes you to import an srt format subtitle file into any scene.
It works by converting the SRT file into a Godot Animation Resource. This way you can use any AnimationPlayer and RichLabelText node to play the subtitle.
The reason behind using an Animation Resouce is to take advantage of the power of animations in Godot. Once the animation is created, all the information is compressed and managed by the engine just like any other resource.
Reviews
Quick Information
Subtitle Support Sample Project
This plugin was created to help you work with subtitles inside Godot. It allowes you to import an srt format subtitle file into any scene.It works by converting the SRT file into a Godot Animation Resource. This way you can use any AnimationPlayer and RichLabelText node to play the subtitle.The reason behind using an Animation Resouce is to take advantage of the power of animations in Godot. Once the animation is created, all the information is compressed and managed by the engine just like any other resource.
Supported Engine Version
3.4
Version String
0.1
License Version
MIT
Support Level
community
Modified Date
3 years ago
Git URL
Issue URL