Touch JoyPad (Gamepad)
An asset by shinneider
Install Asset
Install via Godot
To maintain one source of truth, Godot Asset Library is just a mirror of the old asset library so you can download directly on Godot via the integrated asset library browser
Quick Information

Touch JoyPad (Gamepad)
This is easy way to put a joypad in your godot project.
Supported Engine Version
3.2
Version String
1.0.0
License Version
MIT
Support Level
community
Modified Date
5 years ago
Git URL
Issue URL
Godot Touch Joy Pad
Install:
Manual Mode.
- Create
pluginsfolder in project root. - Download this repo and put all files inside a
touchJoyPadfolder (inside apluginsfolder). - Use
touchJoyPad.tscnscene in your project.
- Create
Git Mode.
- if you not started git repo before, start it
git init - in first time
git submodule add https://github.com/shinneider/godot_touchJoyPad.git ./plugins/touchJoyPad - in next repo clone, clone normally, after clone, run
git submodule update --init --recursive
- if you not started git repo before, start it
Configuration:
Basic configuration.
- Arguments.
After import scene check Inspector tab of Godot- Left Pad Style:
Select
tipe of Joy, a classicalD-Pador a modernAnalog. - Map Analog to DPad:
Analog send analogic signal(between -1 and 1), but if set this, the
signal is convertedto nativesui_left,ui_up,ui_rightandui_downsignal (if you need, is possible to receive analog singal too). - Visible Only Touchscreen:
Visible
onlyindevices with touchcapabilities. - Analog Tap To Show:
This
show the analogjust ifuser tap in the screen.
- Left Pad Style:
Select
- Arguments.
Receive Analog movimentation.
- The touchJoyPad is attached to the group Joystick see this
- On each Analog movimentation ths function
analog_signal_changeis fired. The funcanalog_signal_changeanalog_signal_changeanalogPositionandanalogName. - The
analogPositionargumentis x,yAnalog coordinates(x and y containsvalues between -1 and 1) being thatx < 0is moving to theleft,x > 0moving toright,y < 0movingdown,y > 0moving toup, and finallyx = 0 and y = 0isn't moving. - The
analogNameargumentis way tofilter Analog signalif you decide tore-usethe Analog scene (Ex: two analog in screen, left for movimentation and right for aim). - Ex:
analog_signal_changeimplementation.func analog_signal_change(analogPosition, analogName): # When to move Analog, send signal to natives ui signal # but implements a dead zone in 20% in the curso of Analog # This is good for to avoid user mistakes in move hand Input.action_press("ui_left") if analogPosition.x < -0.2 else Input.action_release("ui_left") Input.action_press("ui_right") if analogPosition.x > 0.2 else Input.action_release("ui_right") Input.action_press("ui_down") if analogPosition.y < -0.2 else Input.action_release("ui_down") Input.action_press("ui_up") if analogPosition.y > 0.2 else Input.action_release("ui_up")
Analog Tap To Show.
- If you
need to use this, you need toput de scene insideaViewportContaineror aerror occursandnot compile. - This
occurs becausetheViewportContainerisused to determine a areaofTap To Show. - Ex:
two Analog,one in each cornerof the screen, theViewportContainerdetermines area of each Analog, without this all screen active the two analogs
- If you
Obs in standalone use of
DPadorAnalog.- If you need to
use manuallythe plugins,you need to implement logicfor this cases:Hide(Becauseenable = false,mantains the touch area,i sugestmove button for out of the screenposition = Vector2(-1000, -1000)).Hide if touch device(Check if touch device usingOS.has_touchscreen_ui_hint()).Pass the param AnalogTapToShowContainer(Used for the Analog in Tap To Show)for default he search ViewportContainer in up parent, but if you need, just specify a parent for her (Ex:$"leftPad/JoyStickLeft".AnalogTapToShowContainer = get_parent()).
- If you need to
Help in Test/Debug.
- to help in your test in desktop without touchscreen, enable godot touch emulator.
- Go to
Project Settings, on the left menu searchPointinginsideInput Devices. - Enable
Emulate Touch From Mouse, on this enable, mouse is used as touch on the screen.
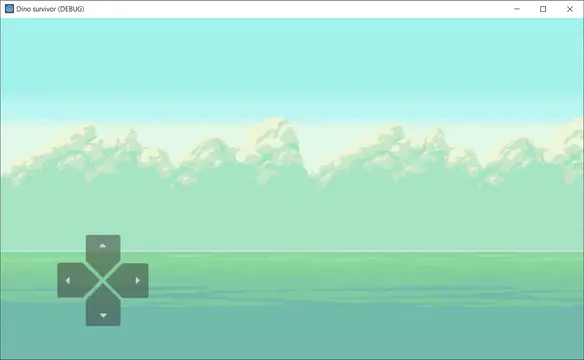
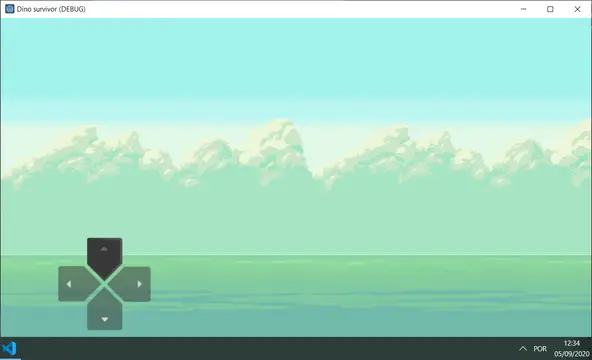
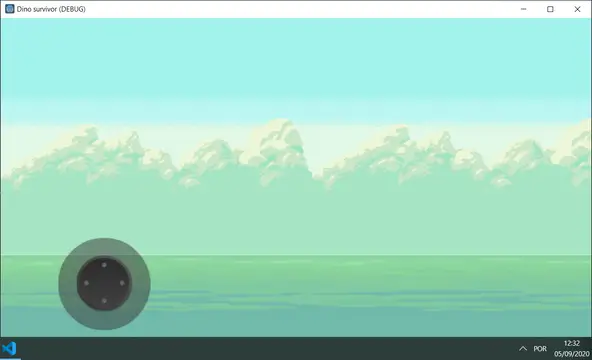
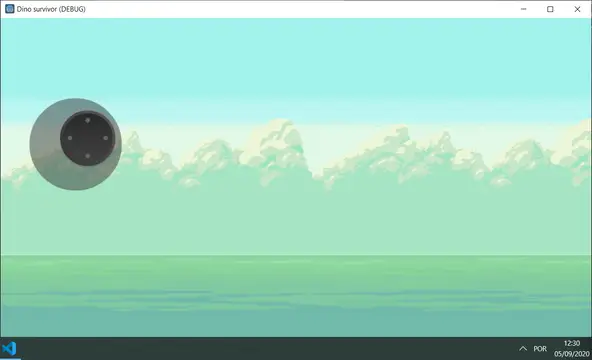
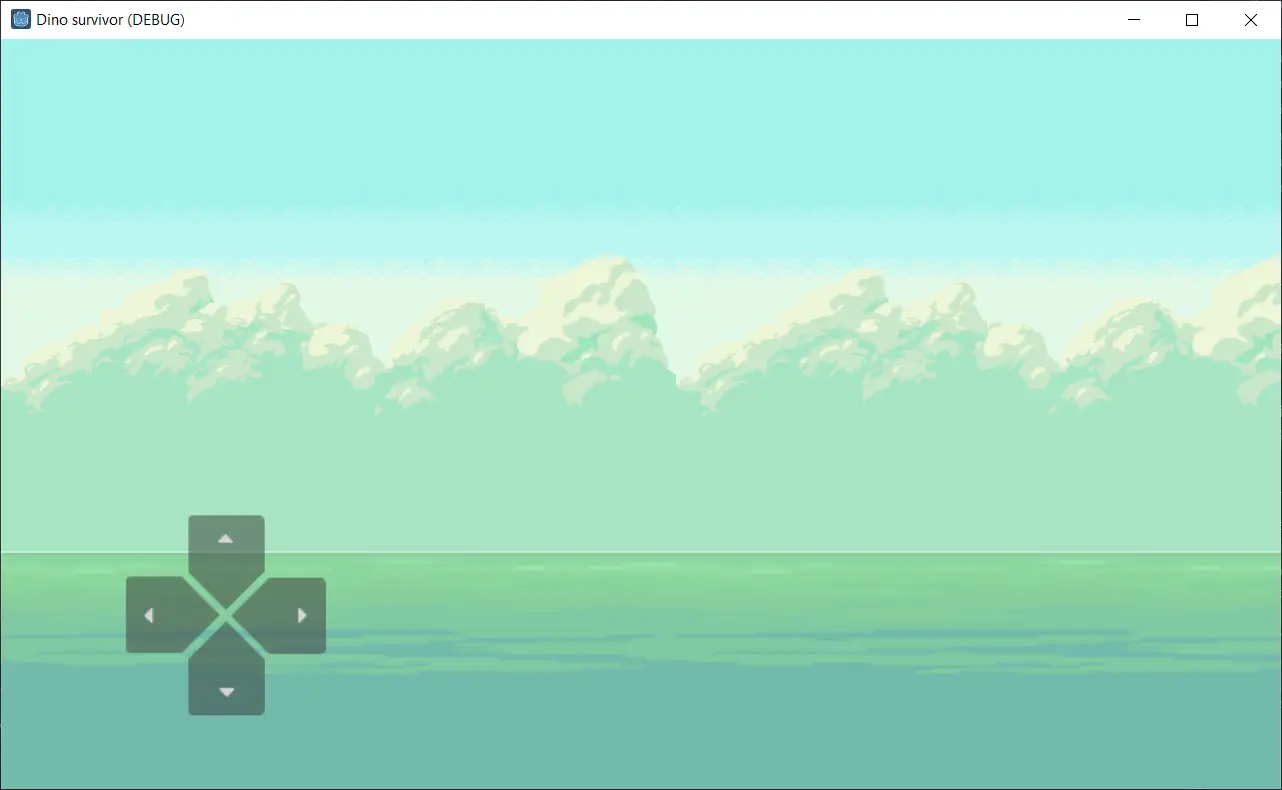
Images:
Using D-Pad:

D-Pad Pressed:

Using Analog:

Using Analog with tap to show:

Credits
- kubecz3k First version of code analog.
- gswashburn Port code analog to Godot 3.
- kenney.kl Art for analog and D-Pad.
This is easy way to put a joypad in your godot project.
Reviews
Quick Information
Touch JoyPad (Gamepad)
This is easy way to put a joypad in your godot project.
Supported Engine Version
3.2
Version String
1.0.0
License Version
MIT
Support Level
community
Modified Date
5 years ago
Git URL
Issue URL