Install Asset
Install via Godot
To maintain one source of truth, Godot Asset Library is just a mirror of the old asset library so you can download directly on Godot via the integrated asset library browser

Quick Information

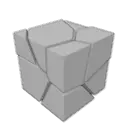
Adds a method of converting a list of meshes into RigidBodies.
Godot Destruction Plugin
Usage
- Install the Cell Fracture addon in Blender, join your mesh and use F3 to search for Cell Fracture. Set the Source Limit to how many RigidBodies you want in your game. (~5 – 20)
- Export it as .obj, import it in Godot as a scene and create an instance of this scene.
- Install and enable the Destruction plugin from the asset library.
- Add a Destruction node to the intact scene and set the Shard Sceneto the fragmented scene.
- Set the Shard Template to a template from the res://addons/destruction/ShardTemplates/ folder or leave it as default.
- Set the Shard Containerpath to the node the fragmented objects will be added to at runtime or leave it empty.
- Call destroy() to destroy the object.
Tutorial
Segmenting your mesh
Import your mesh into Blender and install the Cell Fracture add-on. Then join all your object and either navigate to Object > Quick Effects > Cell Fracture or press F3 and search “Cell Fracture”. A dialog will open where you can configure the cell fracture.
The only parameter that is required to be changed is Source Limit under Point Source. It says how many fragments it will create. It is important to keep this bellow 10 if you want many of your objects destroyed at the same time, or below 20 if there is only one of them, as this is also the amount of RigidBodies that will be created if the object is destroyed. You will need to test how many you can handle in-game.
After the cell fracture process has finished, select everything except the original mesh and export your object as .obj. In the export settings, set Selection Onlyand Triangulate Facesto true.
Importing the model
Create a new folder for the model in your Godot project and put your fractured mesh inside it. Click on the .obj file and go to the Import tab. Change Import As to Scene and click on Reimport. This will import the .obj as a scene with each fragment as one MeshInstance. Double click the .obj file and choose New Inherited. Save the created scene in the new folder.
You will need the intact version of your model imported into Godot too.
Installing the addon
Go to the asset library and install the Destruction add-on by Jummit. Enable it under Project > Plugins.
Setting the destruction up
If you haven’t already, create a scene that contains your intact object. Add a Destructionnode and drag your segmented scene into the Shard Sceneproperty.
The Shard Template scene is the scene that will be instantiated for each MeshInstance in the Shard Scene. There are pre-made shard templates under res://addons/destruction/ShardTemplates.ExplosionShardTemplate makes objects fly into the air and away from the origin, making it look like an explosion.FadingOutShardTemplate makes fragments transparent and slowly fade away.GettingSmallerShardTemplate makes fragments smaller and disappear after a while.
Shard Container is a path to the node where the fragmented meshes will be added to. This is the parent of the mesh the Destruction node is added to by default.
Destroying the object
When you want to destroy your object is very gameplay-dependent. To initialize the destruction, call destroy on the Destruction node. It will destroy the original node and add a fragmented version to the Shard Container.
Adds a method of converting a list of meshes into RigidBodies.
Reviews
Quick Information

Adds a method of converting a list of meshes into RigidBodies.

