Install Asset
Install via Godot
To maintain one source of truth, Godot Asset Library is just a mirror of the old asset library so you can download directly on Godot via the integrated asset library browser

Quick Information

Yet another multi mesh scatter.A simple MultiMesh plugin where you can place your meshes into your scene via a configurable polygon area.
YAMMS - Yet Another MultiMesh Scatter
A plugin for Godot to place MultiMesh meshes into the game world.
Author: Mattiny Youtube: https://www.youtube.com/@Mattiny
Note: This plugin is only compatible with Godot 4.0

Features
- Place MultiMeshInstances of different types into your scene.
- Configure the proportions of how many meshes of each type shall be placed into your scene.
- Set up an area via Path3D polygon in which the meshes shall placed.
- Set up exclusion areas via Path3D polygons (inside your area definition) to leave these areas empty.
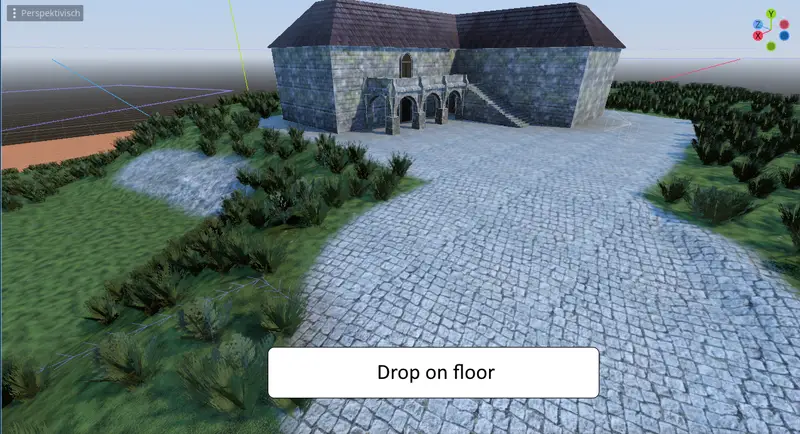
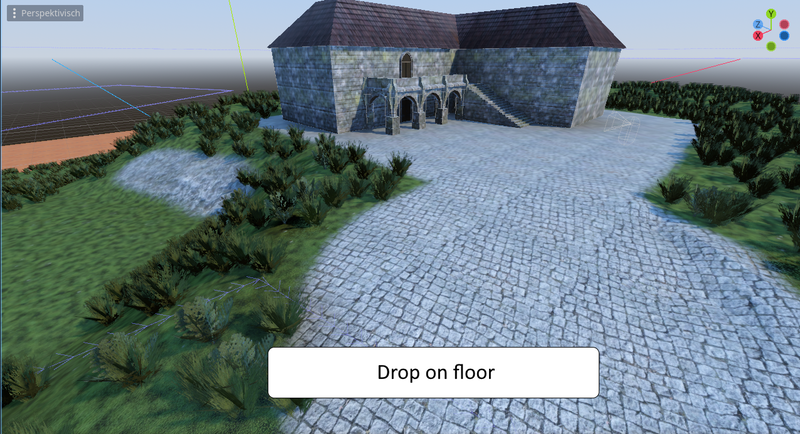
- Configure the height of the generated meshes: "Flat", "Floating" or "Dropped on floor".
Installation
- Download from GitHub: https://github.com/Mattiny/yamms
- Download via Asset library in Godot and activate the plugin.
Usage
MultiScatter
The MultiScatter is the main node of the whole MultiMesh scatter set up.
- In your Scene: Add the node "MultiScatter"
- Whenever the MultiScatter node is selected: The Editor shows buttons to set up a polygon. Add at least 3 point which span an area which is large enough to hold the meshes. Best practice: Change to orthogonal top view of your scene (key "7").

- In Inspector set up properties:
- Amount: the amount of meshes which are generated into the scene.
- Seed: The random number generator seed. Using a seed makes the pattern of randomly generated meshes reproducible. Change the seed until you are satisfied with the result.
- Placement mode: Specifies how the meshes are placed into your scene.
- Flat: all meshes are generated on a flat simple plane.
- Floating: all meshes are generated floating in 3D space
- Dropped on floor: all meshes are generated on the floor. This requires a sufficiently large object with collision shape underneath. Note: The whole polygon must be hovering ABOVE the ground.
- Collision mask: When using "Dropped on floor": set up which collision detection mask shall be used to identify the floor.
- Floating min max: Set up the min- max- range of the mesh's height when floating.
MultiScatterItem
The MultiScatterItem keeps information about one type of meshes in the MultiMesh set up. It needs to be a child node underneath the MultiScatter node. There can be multiple MultiScatterItems in one MultiScatter.
- In your scene: Add the node "MultiScatterItem" as a child node to a MultiScatter node.
- Select the MultiScatterItem.
- Set up parameters:
- Proportion: The amount proportion for this mesh. The exact amount depends on the "Amount" property of the parent MultiScatter and the proportion of sibling MultiScatterItems.
- Random Rotaion: if activated: The max angle of the random rotation of each mesh.
- Random Scale: if activated: The max random scale of each mesh.
Set up a MultiMeshInstance3D (standard Godot behaviour)
- In the inspector: Paramter "MultiMesh": Create a new MultiMesh
- Click at the new MultiMesh: The MultiMesh parameters open and are editable
- set "Transform Format" to "3D"
- Drag & Drop a mesh from your file system into the inspector property "Mesh"
- If necessary: Drag & Drop a meterial for this mesh to inspector property "Geometry / Material override"

MultiScatterExclude
The MultiScatterExclude defines a sub area which is left empty without any mesh generated in it. It is expected to be a child node of MultiScatter. There can be more than one MultiScatterExclude in one MultiScatter.
As done for MultiScatter: set up points of the area polygon. It only makes sense to place the polygon inside (or at least overlap) the area of the MultiScatter.
- Do not place a MultiScatterExclude completely outside the MultiScatter area (Well, if you want to: do it. But it won't have any effect then.)
- Do not cover the whole MultiScatter area with MultiScatterExclude areas. This way to meshes will be generated because there is no room for the meshes.

Generate
Once the MultiScatter set up has been completed, select the MultiScatter node again. Right next to the buttons which let you draw the polygon there is a "Generate" button. Hit the generate button and all meshes are generated and placed into your scene.
You still can edit your set up (move polygons, add/remove points to polygons, add MultiScatterItems, etc). But remember: to make these changes effective you need to hit the "Generate" button again.

Placement Modes examples


Yet another multi mesh scatter.
A simple MultiMesh plugin where you can place your meshes into your scene via a configurable polygon area.
Reviews
Quick Information

Yet another multi mesh scatter.A simple MultiMesh plugin where you can place your meshes into your scene via a configurable polygon area.

