Vertex Animation Demo
An asset by yanorax
Install Asset
Install via Godot
To maintain one source of truth, Godot Asset Library is just a mirror of the old asset library so you can download directly on Godot via the integrated asset library browser

Quick Information

Vertex Animation Demo
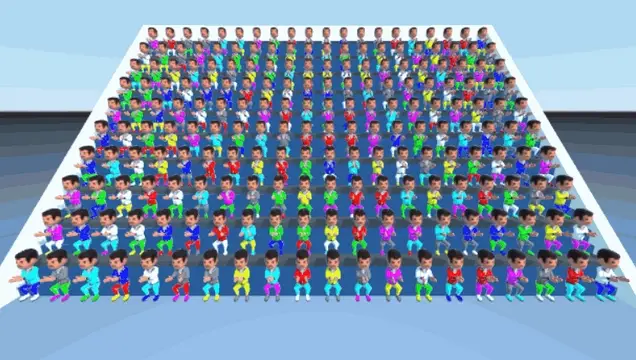
This project demonstrates how to animate a 3D mesh using vertex data generated by the "Not Unreal Tools - Vertex Animation" Blender add-on, with a vertex shader inside Godot Engine.
Supported Engine Version
3.3
Version String
1.0
License Version
MIT
Support Level
community
Modified Date
3 years ago
Git URL
Issue URL
Godot-VertexAnimation-Demo
Vertex Animation Demo Project for Godot Engine v3.3+
Preview

Description
This project demonstrates how to animate a 3D mesh using vertex data generated by the Not Unreal Tools - Vertex Animation Blender add-on, with a vertex shader inside Godot Engine.
Blender Add-On Guide
- Download the files from Not Unreal Tools - Vertex Animation and install vertex_animation.py in the Blender -> Edit -> Preferences... -> Add-ons -> Install... menu. In the 3D Viewport side bar, you should now have a Not Unreal Tools menu and if selected it will show a Vertex Animation panel.
- In Object Mode select the object you want to process, make sure the current animation you want is selected and playable in the Timeline.
- Adjust the Frame Start, End and Step values as required. Changing these settings will update corresponding Timeline values.
- Click the Process Anim Meshes button. This will create a new object named export_mesh in the Outliner, this is the special mesh that will be animated. In the source .blend file path there will be a newly created folder called vaexport and inside will be two files; normals.png and offsets.exr.
- The export_mesh needs to be exported as a glTF file for importing into Godot. Select the export_mesh object in the Outliner and then from the Blender File menu, select Export -> glTF 2.0 (.glb .gltf). Make the following changes to the export options and then click the Export glTF 2.0 button:
- Include -> Selected Objects (enable)
- Geometry -> Materials (disable)
- Animation -> Animation, Shape Keys, Skinning (disable all)
- Filename -> can rename to anything
Godot Import Guide
- You should now have 3 files generated from Blender: normals.png, offsets.exr and export_mesh.glb (whichever filename was chosen, this guide will refer to the default name).
- Copy the files into the Godot project folder of your choice. Godot will run the import process as soon as it detects the new files. The import settings for each file still need more changes to ensure all of them work properly with the vertex shader.
- In the Godot FileSystem dock, select the glTF file (export_mesh.glb) and then click the Import dock (default location is docked along side of the Scene tree). Godot Docs - Importing 3D Scenes
- Make the following adjustments and then click the Reimport button. There should be a new file called export_mesh.mesh in the same folder as the glTF file (export_mesh.glb).
- Meshes:
- Compress -> (disable)
- Ensure Tangents -> (disable)
- Storage -> Files (.mesh)
- Animation:
- Import -> (disable)
- Meshes:
- Add a MeshInstance or MultiMeshInstance node to the scene. Drag the export_mesh.mesh file into the Mesh parameter slot for a MeshInstance or the Mesh parameter slot inside the MultiMesh for a MultiMeshInstance node. This guide will not cover loading Mesh resources via script.
- The import settings for normals.png and offsets.exr will need to be updated after they are added into the shader parameters since Godot will make changes based on what node the image was applied to (3D nodes apply import settings for images used in 3D).
- Apply the custom vertex animation shader material to a MeshInstance/MultiMeshInstance. Recommend using the GeometryInstance -> Geometry -> Material Override slot.
- Go to the Shader Parameters and click the drop-down arrow and select load for the following parameters:
- Offset Map -> load offsets.exr
- Normal Map -> load normals.png
- Now find normals.png and offsets.exr in the FileSystem dock, go to Import settings, make the following changes for both files and click the Reimport button:
- Compress:
- Mode -> Lossless for normals.png, Uncompressed for offsets.exr
- Flags:
- Repeat -> (disable) when changing the current frame using an AnimationPlayer or via script. (enable) when looping animations using shader TIME.
- Filter -> (disable)
- Mipmaps -> (disable)
- Compress:
- If you are importing more image files such as albedo textures, refer to Godot Docs - Importing Images. For palettes and texture masks, recommend using Lossless compression and disable Filter and Mipmaps, so there is no blending of the colours.
Assets
characterMedium by Kenney - CC0 License
castle by Kay Lousberg - CC0 License
lowpoly crystals pack by iPoly3D - CC0 License
Turquoise Ice Background by Circe Denyer - CC0 License
This project demonstrates how to animate a 3D mesh using vertex data generated by the "Not Unreal Tools - Vertex Animation" Blender add-on, with a vertex shader inside Godot Engine.
Reviews
Quick Information
Vertex Animation Demo
This project demonstrates how to animate a 3D mesh using vertex data generated by the "Not Unreal Tools - Vertex Animation" Blender add-on, with a vertex shader inside Godot Engine.
Supported Engine Version
3.3
Version String
1.0
License Version
MIT
Support Level
community
Modified Date
3 years ago
Git URL
Issue URL