kalulu_games
ProCam2D - Godot 4.x
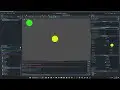
ProCam2D is a versatile and feature-rich custom 2D camera node for the Godot Engine, designed to provide industry-quality camera controls for any type of 2D game. This plugin offers extensive customization, including multiple follow modes, smooth transitions, and support for cinematic sequences. With a robust addon system, developers can easily extend its functionality with custom behaviors. Some inbuilt addons include shake effects, grid snapping, and more. ProCam2D is controlled via an autoload, making it accessible from any script in your project. Ideal for developers seeking precise and professional camera behavior, ProCam2D enhances game immersion and player experience.For a more recent version, contributions or bug reports, visit: github.com/daz-b-like/ProCam2D_Godot4.x/