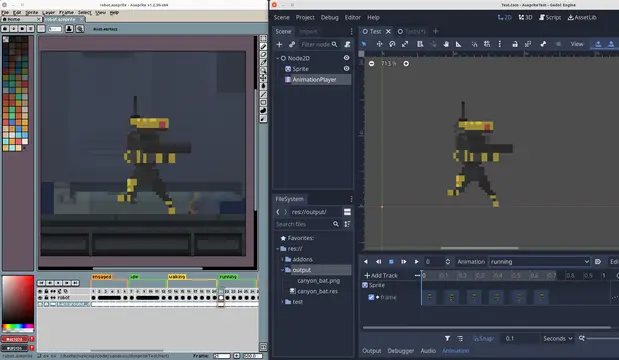

Import Aseprite animations to AnimationPlayers, AnimatedSprites2D, AnimatedSprite3D and SpriteFrames.Features:- Generate sprite sheet and import animations to AnimationPlayer, AnimatedSprite, AnimatedSprite3D or SpriteFrames resource.- Adds Inspector docks for easy import and re-import.- Filters out layers you don't want in the final animation, using regex.- Supports slices. Import only a region from your file./- Supports Aseprite animation direction (forward, reverse, ping-pong).- Supports loopable and non-loopable animations.- Separates each Aseprite Tag into animations. In case no tags are defined, imports everything as default animation.- AnimatedSprite - Creates SpriteFrames with Atlas Texture to be used in AnimatedSprites. - Converts Aseprite frame duration (defined in milliseconds) to Godot's animation FPS. This way you can create your animation with the right timing in Aseprite, and it should work the same way in Godot. - Choose to export the Aseprite file as a single SpriteFrames resource, or separate each layer in different resources. - Adds Aseprite file importer to Godot (check limitations section).- AnimationPlayer - Adds and removes animation tracks without removing other existing tracks. - You are free to import multiple files to the same AnimationPlayer or import each layer to their own Sprite and AnimationPlayer.Aseprite Wizard is only required during development. If you decide to not use it anymore, you can remove the plugin and all animations previously imported should keep working as expected.
Touch JoyPad (Gamepad)
An asset by shinneider
Quick Information

Touch JoyPad (Gamepad)
This is easy way to put a joypad in your godot project.
Supported Engine Version
3.2
Version String
1.0.0
Support Level
community
Modified Date
5 years ago
Git URL
Issue URL
Godot Touch Joy Pad
Install:
Manual Mode.
- Create
pluginsfolder in project root. - Download this repo and put all files inside a
touchJoyPadfolder (inside apluginsfolder). - Use
touchJoyPad.tscnscene in your project.
- Create
Git Mode.
- if you not started git repo before, start it
git init - in first time
git submodule add https://github.com/shinneider/godot_touchJoyPad.git ./plugins/touchJoyPad - in next repo clone, clone normally, after clone, run
git submodule update --init --recursive
- if you not started git repo before, start it
Configuration:
Basic configuration.
- Arguments.
After import scene check Inspector tab of Godot- Left Pad Style:
Select
tipe of Joy, a classicalD-Pador a modernAnalog. - Map Analog to DPad:
Analog send analogic signal(between -1 and 1), but if set this, the
signal is convertedto nativesui_left,ui_up,ui_rightandui_downsignal (if you need, is possible to receive analog singal too). - Visible Only Touchscreen:
Visible
onlyindevices with touchcapabilities. - Analog Tap To Show:
This
show the analogjust ifuser tap in the screen.
- Left Pad Style:
Select
- Arguments.
Receive Analog movimentation.
- The touchJoyPad is attached to the group Joystick see this
- On each Analog movimentation ths function
analog_signal_changeis fired. The funcanalog_signal_changeanalog_signal_changeanalogPositionandanalogName. - The
analogPositionargumentis x,yAnalog coordinates(x and y containsvalues between -1 and 1) being thatx < 0is moving to theleft,x > 0moving toright,y < 0movingdown,y > 0moving toup, and finallyx = 0 and y = 0isn't moving. - The
analogNameargumentis way tofilter Analog signalif you decide tore-usethe Analog scene (Ex: two analog in screen, left for movimentation and right for aim). - Ex:
analog_signal_changeimplementation.func analog_signal_change(analogPosition, analogName): # When to move Analog, send signal to natives ui signal # but implements a dead zone in 20% in the curso of Analog # This is good for to avoid user mistakes in move hand Input.action_press("ui_left") if analogPosition.x < -0.2 else Input.action_release("ui_left") Input.action_press("ui_right") if analogPosition.x > 0.2 else Input.action_release("ui_right") Input.action_press("ui_down") if analogPosition.y < -0.2 else Input.action_release("ui_down") Input.action_press("ui_up") if analogPosition.y > 0.2 else Input.action_release("ui_up")
Analog Tap To Show.
- If you
need to use this, you need toput de scene insideaViewportContaineror aerror occursandnot compile. - This
occurs becausetheViewportContainerisused to determine a areaofTap To Show. - Ex:
two Analog,one in each cornerof the screen, theViewportContainerdetermines area of each Analog, without this all screen active the two analogs
- If you
Obs in standalone use of
DPadorAnalog.- If you need to
use manuallythe plugins,you need to implement logicfor this cases:Hide(Becauseenable = false,mantains the touch area,i sugestmove button for out of the screenposition = Vector2(-1000, -1000)).Hide if touch device(Check if touch device usingOS.has_touchscreen_ui_hint()).Pass the param AnalogTapToShowContainer(Used for the Analog in Tap To Show)for default he search ViewportContainer in up parent, but if you need, just specify a parent for her (Ex:$"leftPad/JoyStickLeft".AnalogTapToShowContainer = get_parent()).
- If you need to
Help in Test/Debug.
- to help in your test in desktop without touchscreen, enable godot touch emulator.
- Go to
Project Settings, on the left menu searchPointinginsideInput Devices. - Enable
Emulate Touch From Mouse, on this enable, mouse is used as touch on the screen.
Images:
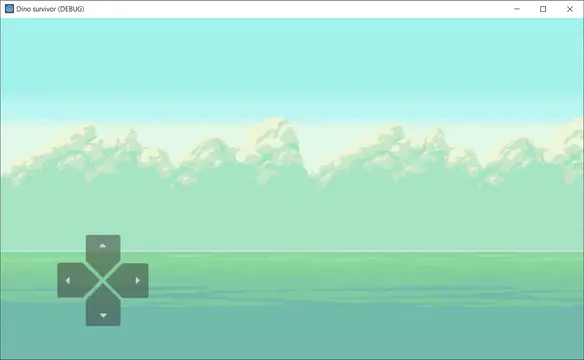
Using D-Pad:

D-Pad Pressed:

Using Analog:

Using Analog with tap to show:

Credits
- kubecz3k First version of code analog.
- gswashburn Port code analog to Godot 3.
- kenney.kl Art for analog and D-Pad.
This is easy way to put a joypad in your godot project.
Reviews
0 total reviews
Quick Information
Touch JoyPad (Gamepad)
This is easy way to put a joypad in your godot project.
Supported Engine Version
3.2
Version String
1.0.0
Support Level
community
Modified Date
5 years ago
Git URL
Issue URL
Related Assets
More in 2D Tools

Renders Latex in Godot Mono! Usage Instructions:1.Create a Godot Mono project and build a C#-script.2. Install from the Godot Asset Store from inside the Engine or by cloning. When including in an existing project, you won't need the *.godot and *.sln.3. The add-on depends on CSharpMath.SkiaSharp, licensed under MIT, as a nuget package. You to integrate this into your existing Godot Mono project by copying the <ItemGroup>-tags into your project's .csproj-file from GodoTeX.csproj.4. Enable the addon in the settings, as usual. You can now create a LaTeX node and start your math excapades!
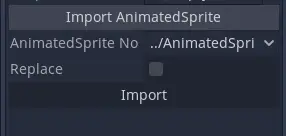

A basic plugin to automatically import all frames from an AnimatedSprite as animations in an AnimationPlayer, with the appropriate FPS. It adds a section under AnimationPlayer's inspector to import frames from AnimatedSprites in the scene.
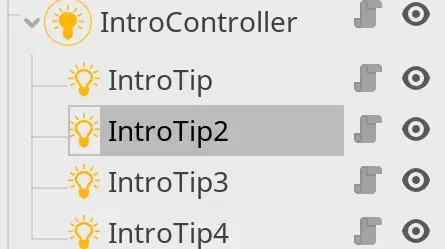

easy to use add-on for creating tutorials and introduction section inside Godot scenes.Create an IntroController, and set its name/theme (for label and buttons). Then add IntroTip nodes to it as children. set highlighted area for your tip using Godot's native polygon tool, give it a tip text, and then start the intro by calling start() on Introcontroller.